Monday, December 19, 2011

Integrated Pest Management

Integrated Pest Management (IPM) is a pest control method which incorporates ecological principles into pest management practices. Gardens are full of insects, some are considered beneficial because they act as pollinators, decompose organic matter, or eat pests. However many of the critters and insects in gardens are considered pests, which the IPM program of the University of California defines as "organisms that damage or interfere with desirable plants...(they) also include organisms that impact human or animal health."

In the picture below you will find a lady bug and several aphids. Aphids are soft-bodied insects that feed on the sap of plants; they are considered pests because they damage the ability of the plant to provide nutrients to its leaves. Aphids also accumulate rather quickly, so if one is found, many more will follow. Luckily, aphids can usually be removed by spraying them off with water or hand picking. Larger infestation issues can be resolved with homemade garlic or pepper sprays.

Photo of ladybuy and aphids courtest of Dave Gunn
IPM is a targeted approach to reducing pest populations and is based on the following principles and techniques:
1. There is an acceptable level of pest population. Prior to commercial agriculture many farmers accepted that they would lose a small percentage of their yield to pests. Over time, the standardization of more potent pesticides and elaborate applications (such as crop dusting) changed the expectation of commercial farmers. IPM developed as an alternative to widespread pesticide use in the 1950s throughout the US, when indiscriminate field spraying began to occur on commercial agriculture sites.


2. Preventative cropping and cultural practices. There are several techniques that gardeners can do to reduce pests naturally. A method called intercropping places different plant species next to each other in the garden, rather than planting the same species together. A variety of bugs will be attracted to the different plants, reducing the possibility of an invasion. Plants that attract beneficial organisms (those that deter or eat pests) should be planted throughout the garden. Another method to reduce pests naturally is to plant peppers in between plants. Pepper plants are high in capsaicin and are helpful in deterring mammalian pests.


Photo of habanero peppers courtesy of Amy Kay Watson

3. Monitoring. Monitoring is the key to success with IPM practices. Careful observation and identification of which species are harming the garden will allow the gardener to determine the best method of pest control.


4. Appropriate control mechanisms. There are essentially three control mechanisms used in IPM: mechanical, biological, and limited pesticidal controls. When pest populations are low and localilized, mechanical controls (such as hand-picking or water spraying) can remove pests best. Biological controls include the use of natural sprays, intercropping, and incorporating plant species that attract natural enemies of pests. Finally, limited pesticidal controls are used when both mechanical and biological controls have failed. A targeted application of a pesticide may be used to reduce the pest population.


You can practice Integrated Pest Management in your school's garden. In late January/early February, start planning your garden. This is easily done by tracing an outline of your planting area and creating symbols for different plants. Incorporate the concepts of intercropping into your garden design. Also, try to include nectar-producing plants which tend to attract a variety of pest enemies naturally. Other plants to try: marigolds, peppers, and garlic.


For a list of plants to combat particular pest species see: http://en.wikipedia.org/wiki/List_of_repellent_plants


For more information on IPM: http://www.ipm.ucdavis.edu/GENERAL/whatisipm.html


The Radish Density Experiment

Radishes are the edible root of a rapidly germinating plant of the Brassicaceae family. In fact, the word radish derives from the Greek word Raphanus, which literally means to "appear quickly". Most radish varieties take 25-30 days to mature from seed to full-sized root. Like many edibles in the Brassicaceae family, they also thrive in cooler temperatures, making them the perfect seed to use in a winter experiment.


Photo of radishes courtesy of Allison P. (Worldharmony)


CONCEPTS:


This experiment should help students understand the ideal population densities for radish crops and prompt them to hypothesize how nutrient uptake and availability is impacted by population density.


-Population density (plants): Can be defined as the amount of plants contained within a spatial parameter (e.g. the number of radish plants in one square foot). Population density studies are often referred to as "crowding" studies. In this case we are examining plants, but population density is a ubiquitous topic in biology and can refer to any organism, even humans.


-Nutrient uptake and availability: Refers to the amount of critical elements, such as carbon, nitrogen, phosphorous and potassium, as well as water and sunlight, that are readily available to the plant and the ability of the plant to procure those elements from the environment. Uptake and availability can be severely impacted by plant density as competition between plants increases with higher densities.


PROCEDURE:


To do the experiment you will need radish seeds, a planting area with at least 24 square feet (this can be noncontiguous-raised beds or pots are fine), a ruler, and a scale.


-Section off six 2 ft. x 2 ft. areas, for a total of six 4 sq. ft. sections.


-Two of the 4 sq. ft. sections will be used for 1-inch planting densities, two sections will be used for 2-inch planting densities, and the remaining two sections will be used for 4-inch planting densities.


-Use the ruler to help you plant seeds and space them according to the image below. If you are planting the 4-inch density section, make sure each seed is equidistant from the other seeds. Use the image below as a guide:


-Once the seeds are planted, be sure to water each section at the same time and with the same amount of water. You can also use the planting guide on the back of the seed packet to identify ideal watering and planting conditions.


-Take notes on how the plants grow at one week intervals and use these observations to hypothesize which planting density is best for radishes.


-After thirty days, make your final observations about the growth of the plant and pull the radishes, but be careful to keep each section separate.


-Next, weigh each section individually using a scale and record your values.


QUESTIONS:


Based on your findings, can you determine which density was ideal for radishes? How did your hypothesis based on your observations differ from your final results? Did the density of the radishes appear to have any effect on the weight or total amount of radishes in each section? Were the findings between similar sections identical or did they vary?

Dormancy and Vernalization

Over time many plants and trees have developed strategies to protect themselves and to thrive in their particular climate. Two such strategies, which usually occur in tandem are dormancy and vernalization. Dormancy refers to a period of time when the organism physically stops growing; this is typically done to conserve energy during the colder months of the year or to protect itself from adverse environmental conditions. Plant and tree dormancy that occurs in response to environmental conditions is called consequential dormancy, and predictive dormancy occurs when an organism's natural biological cycle anticipates a weather change and promotes dormancy in advance. During dormancy deciduous plants will lose all of their leaves and evergreens suspend growth. The picture of the white birch tree below shows a dormant tree that has lost its leaves and is essentially "hibernating" through winter.

Photo of dormant white birch tree courtesy of Jilly Clardy
Vernalization refers to the period of cold weather exposure experienced by plants and trees, which actually enables them to set buds and produce fruit when warmer temperatures arise. To clarify, dormancy refers to the suspension of the organism's growth in anticipation or response to environmental change, while vernalization refers to the plants ability to set flowers or produce fruit after dormancy in a direct response to cold weather exposure. If you have stone fruits like peaches and plums or even apples, these all need a vernalization period for them to be able to bear fruits. This is why it is more common to see stone fruits and apples in the Inland Empire than it is too see them along the coast.


Vernalization was discovered after many years of observation by agronomists and plant physiologists. A pioneering researcher in this field, Russian agronomist Trofim Lysenko, coined the term 'vernalization' and he also developed methods to manipulate plants which require vernalization to induce early production by artificial exposure to cold temperatures. In fact, Lysenko is credited with saving millions in Russia during a long, cold winter by being able to germinate winter wheat crops ahead of schedule, making food available in the spring instead of the summer.


*You can observe the process of dormancy at your own school. Take a few moments to observe the plants and trees in the garden and note which have lost their leaves and which have not.


*In one of our previous posts we discussed the citrus tree and its unusual characteristic of fruting in winter while many plants are dormant. Do some research to determine if, or when, the citrus tree experiences dormancy.


For more reading on dormancy and vernalization, please see the following websites: http://en.wikipedia.org/wiki/Dormancy


http://ahs.org/publications/the_american_gardener/pdf/0405/Everyday_Garden_Science_51.pdf
http://en.wikipedia.org/wiki/Vernalization

Wednesday, December 14, 2011

Winter Fruiting Citrus Trees


Photo Courtesy of Andy Jien
In a previous blog post, we talked about two of the few fall fruiting trees, Persimmons and Pomegranates. Today's blog will be about citrus trees, some of the few winter fruiting trees. Citrus is a commonly used term that refers to several of the flowering varieties of the genus Citrus; the fruiting trees included within this genus are: lemons, limes, oranges, grapefruit, tangerines, and most species of kumquats.

Some of the earliest species of citrus trees are believed to originate from Southeast Asia near the area bordered by Myanmar (Burma), Northeast India, and the southwest corner of China (Yunnan province). Citrus trees were brought over to Europe from Asia and many of the citrus trees we see in California are decendents of the ones grown in the mediteranean regions of Europe. Citrus trees were commonly grown throughout Southern California around the turn of the century and well into the middle of the twentieth century; in fact, citrus fruit production is what attracted many of the first settlers to the Inland Empire and Orange County (appropriately named after the orange). Throughout human history, citrus have been cultivated and revered not only for their culinary properties, but their health benefits as well.

Citrus trees come in many different sizes and colors. There are standard varieties which grow to be approximately15-25 ft. in height, semi-dwarves are roughly between 8-15 ft. tall, and dwarves (which are the variety at most of the IEUA's school gardens) are about 4-8 ft. tall. Citrus trees begin to flower in the fall and by December most of their fruit have developed. They need a diurnal winter to change color, so our Mediterrenean climate is perfect for witnessing some of the beautiful colors of some citrus species. Some citrus trees grown in tropical locations never experience cool temperatures, which makes them stay green year round even when ripe.

If you live in an area that is near the Inland Empire Utilities Agency (Chino, Montclair, Ontario, Upland, Rancho Cucamonga), then it is likely that citrus trees have played a role in your city's history. As a fun project, have your students research the role that citrus played in your city. Try to find out which species of citrus were grown in your area and by whom.

For more reading on citrus and its role in Inland Empire history, please see the following websites:

http://en.wikipedia.org/wiki/Citrus                   Time line of Citrus in the Inland Empire:

Los Osos High School is Moving Strong!

Volunteers trenching for irrigation.
Los Osos High School in Rancho Cucamonga is definitely a new type of experience for me in terms of administering the garden installation. While normally when we have volunteer workdays, we'll have a LOT of people attending, either a lot of kids or a lot of adults or both. Los Osos hasn't had very many volunteers. Interestingly though, they are quite dedicated to getting their garden installed. Even with only about 5 volunteers per workday able to attend, they've been moving at just about the same pace as the other schools with 20 - 30 volunteers.

Volunteers installing mediterranean herbs
 We've manage to be able to install about 50 plants, including 5 fruiting trees. We've installed all the underground irrigation for the site, and we've built six vegetable boxes and filled them with soil.
Volunteers building vegetable boxes.
 Not very many parents and teachers have been able to attend, but the few that have have been extremely helpful. Here we have a substitute teacher building vegetable boxes with his son.
Ms. Dolce installing the first plant, a navel orange.

Here is Ms. Dolce planting the very first tree of the garden just before thanksgiving break. This is a Navel Orange, Ms. Dolce subsequently installed all of the fruiting trees in the garden.

Monday, December 12, 2011

Rainy Season Runoff


Photo courtesy of Roger Mommaerts
 The rainy season in southern California occurs between the months of December and April, although we occasionally experience rain in May and June. The average precipitation of rain in southern California is about 12", with the majority of rainfall occuring in the month of February.
Although rain is not plentiful in southern California, especially compared with the majority of the United States, we do receive enough water that it can be harvested and stored for later use.

In fact, one way to conserve water and to help your garden grow is to capture rainwater on site in a rain barrel so it can be reused later during drier months.

Rain barrels can be purchased at your local garden or home improvement store. They are easy to install as you can see from the picture, but all rain barrel systems are different so read the directions before you start the installation.

Most rain barrel systems attach a hose to the rain gutter on the side of your house or building. Water is then diverted directly into the barrel. Barrels range in size from 50-60 gallons, so they can hold quite a bit of water and become very heavy.

One of the greatest benefits of installing a rain barrel is that you offset your potable water demand and do your part to conserve water. It also conserves water by recharging the rain water into the ground instead of running off into storm drains.


Friday, December 9, 2011

Upland High School Completed!

Avocado and Citrus at Upland High
 Well we finished the garden at Upland High(we actually finished in November). Here are a couple of photos I wanted to share with you all.

Upland High planted, a lot of fruit trees: Citrus, Avocados, Persimmons, Figs, and Pomegranates, all of which are drought tolerant and climate appropriate. They also received 14 vegetable beds. Because they only received a few trees and mulch we allowed for them to make up the rest of the grant in vegetable beds.


Vegetable beds at Upland High

Once we receive permission to share the photos of the kids working in the garden, we'll share them with you on this blog. Stay tuned for a dedication date as well! It was a lot of fun working with Mrs. McAdams and Mr. Whieldon and their students on this project.

Monday, December 5, 2011

Santa Ana Winds

PhotoSource: //en.wikipedia.org/wiki/File:Santa_ana_winds.jpg

Southern California's coastal and inland areas are known for their mild weather patterns and mediterranean climate. However Southern California does experience certain unique weather phenomena, one of which is the Santa Ana winds. The Santa Ana winds are warm (sometimes hot), dry winds that sweep across Southern California and Baja California usually during the fall and winter seasons.

Santa Ana winds originate from the desert and flow in a southwest direction toward the sea. This is an unusual wind current as most breezes blow in an easterly direction. During cooler seasons, high pressure begins to build up in the Great Basin (western Nevada) and the temperature starts to drop. The cool, dense air is forced east to lower elevations where it begins to pick up speed and simultaneously increase in temperature as it passes through the Mojave Desert. Santa Ana winds can be very destructive as they can easily reach 40-70 mph. By the time they reach the larger population nodes of the inland valley, the air is hot and extremely dry. These conditions can intensify fires and cause severe damage to property and life.

Although it has several destructive characteristics, the Santa Ana Winds are here to stay. They preceded human settlement in this area and it is imperative that we learn to adapt to this weather phenomenon. If you have a garden with young trees, reinforce their trunks by tying a straight stake or pole to the tree. Also, if you're growing a vegetable garden, be sure to water regularly as the dry winds can damage crops.

Article sources and additional information can be found at:


Monday, November 21, 2011

The Thanksgiving Bird and the Possibilities in Your School Garden.


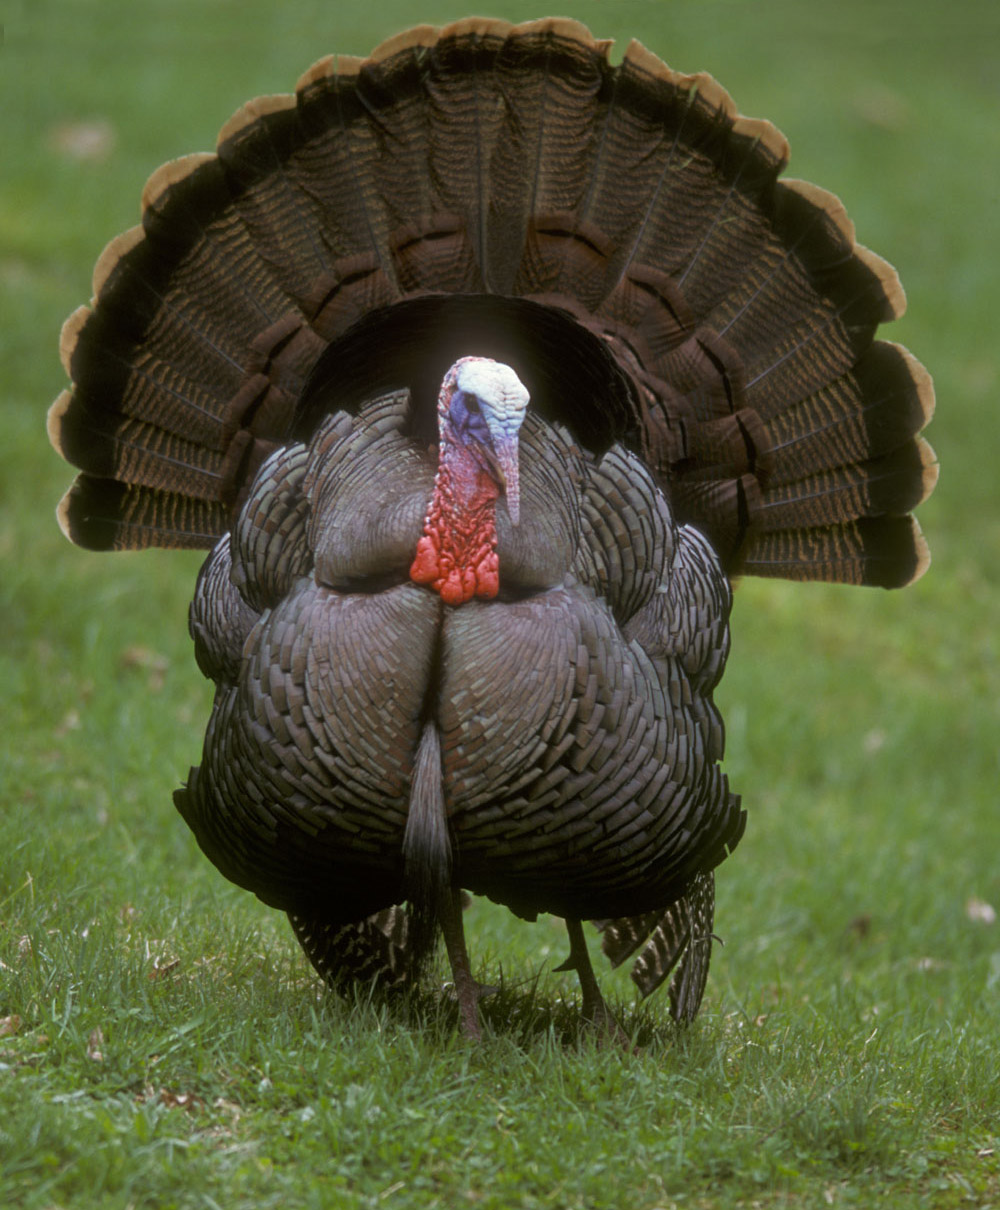
Wild Hen Turkeys
The turkey can be a great addition to your garden and I'll get to why, but first some history on the thanksgiving symbol! The Turkey is a bird that is native to America. Benjamin Franklin once suggested that th turkey should have been the national bird instead of the Bald Eagle. That may seem like a silly idea now, but back in Benjamin Franklin's time, wild turkeys were a much different animal than the giant turkeys that we eat for dinner. Wild turkeys even today are often seen in wild areas of America, they are much slimmer and a lot more agile than the type that is commonly eaten for thanksgiving. The Toms (male turkeys) will remind you of the turkeys that you drew when you were a kid. Wild turkeys are known to fly, and will often perch up in trees at night in order to hide form predators.

Wild Tom
Heritage Turkeys are an old breed of turkeys that people used to raise before modern day advancements in large turkeys. The turkeys were larger than the wild turkeys and usually can not fly. However, they are still agile enough to jump fairly high and perch in trees at night. I used to raise a couple of different breeds of heritage turkeys, I even had a Bourbon Red Turkey before I passed it on to the Lyle Center for Regenerative Studies. It is estimated that there are only 5,000 breeding Bourbon Red Turkeys left in America. These types of turkeys are seeing a resurgance because of renewed interest in heritage breeds.
Bourbon Red Heritage Tom


The type of turkey that you buy at the store is bred to be so big, that they cannot jump at all (sometimes they can't even walk). This is why turkeys now are able to feed such large families, because they are bred to be so large. In the past and at the first thanksgiving dinner, turkeys were nowhere near the size of what we see on the dinner table today.

So, you might be asking what does this have to do with gardens? Well, after having raised turkeys and kept them in my garden at home, and after some research. I have found that turkeys make GREAT insecticides. My turkeys were phenomenal at keeping bugs out of my garden. In fact, all summer long I had absolutely no problems with insects. Many farmers will say that the only insect that the turkey won't eat, is the insect it can't catch. Turkeys are great at pest control. In fact, my turkeys ate so many insects and even seeds from weeds, that they hardly ever at their feed, yet they remained healthy and fat. Now, that the Lyle Center has my old turkeys, I haven't yet come up with a plan to keep insects at bay. I may end up raising just one more turkey just for the sake of keeping pests away. But be careful, they will eat seedlings and young plants.

Raising a jake (baby turkey) can be a great experience for kids at a school. It is relatively easy and there are feed stores that can help you all over the inland empire. I suggest it for anyone that is looking for a natural pest control option, and for anyone that wants to teach more biological and ecological sciences. Also, the turkey poop will make great fertilizer!

Friday, November 18, 2011

Sign up for the FREE Environmental Education Workshop Series with Santa Ana Watershed Association

My friends over at the Santa Ana Watershed Association is hosting an Environmental Education Workshop Series for educators. It is completely free!

The first of the series will be Project Learning Tree and will be held on January 21, 2012, 10:00am - 3:00pm

The second will be Project Wet on January 28, 2012, 10:00am - 3:00pm

and third is Project Flying Wild on February 4, 2012, 10:00am - 3:00pm

All the workshops will be held at the Mary Vagle Nature Center at
View Larger Map
You'll have to bring your own sack lunch. But, you'll receive a free curriculum guide along with the workshops.

To register, contact: Carrie Raleigh at carrie@sawaedu.org or 909-280-1120

http://www.sawaedu.org/

Friday, November 11, 2011

Tips for Maintaining and Sustaining Your Garden


Photo courtesy of California School Garden Network
  The California School Garden Network (CSGN) has compiled a booklet entitled: 'Gardens for Learning: Creating and Sustaining Your School Garden'. This helpful book offers advice on incorporating the garden into classroom curricula, as well as funding your garden and general planting information. CSGN also offers a supplement to this book which was designed to assist teachers in incorporating the garden into the California state standards curricula (see link below).

During the Fall and Winter seasons when the garden may not be in peak operation, there are still several things you can do to maintain and sustain your garden. The following suggestions come from Dorothy Peterson, School Garden Coordinator in Davis Joint Unified School District. These can be found on page 85 of 'Gardens for Learning'.


  • Create a garden logo. Logos are a great way to create an identity for the garden and they make the garden more recognizable to funding sources. Also, have your students help create a catchy tagline for the garden.
  • Make sure your school gardens have a strong marker on the school's website or its own webpage. This provides visibility for parents and promotes communication about the garden to the community. It also gives you a reference page for funding sources.
  • Write a "Garden Corner" piece in the school newsletter. The newsletter should be printed in English and any other language common among the student population.
  • Recruit gardening parents at Back-to-School Nights. Remember to follow up recruitment with a couple of training sessions that will accommodate both stay-at-home and working parents.
  • Send out a letter of request for donations. This can be done during the Fall or Winter.
  • Look for unique funding opportunities within your school and community. Check for grants outside of the school district that focus on water wise planting, alternative curricula, healthy schools, etc.


To access 'Gardens for Learning' as an online book, click on the following hyperlink: http://www.csgn.org/page.php?id=36.

A free copy of 'Gardens for Learning: Linking State Standards to Your School Garden' can be requested or downloaded directly from: http://www.cfaitc.org/gardensforlearning/.

Monday, November 7, 2011

What's Up With Purple Pipes?


Photo of purple pipes courtesy of "freshelectrons"
 Water is a precious resource that needs to be conserved, particularly in the semi-arid and mediterranean climates of Southern California. Although roughly 75% of the Earth's surface is covered in water, only 1% of that water is potable (drinkable) water. The supply of potable water is dependent on many environmental factors: adequate snow fall, drought, climate change, etc. The natural variation in potable water sources occasionally produces shortages in our water supply.

Humans use potable water for many processes: clothes washing, electricity generation, crop and field irrigation, etc. Interestingly, not all of these uses require potable water. Oftentimes recycled water can be used as a substitute for potable water. California's plumbing code mandates that recycled water flow through purple pipes. Many of your schools have either already installed purple pipes or they are currently doing so. This means that your school may already irrigate its landscape with recycled water!

So what is recycled water and how is it made? Modern plumbing systems use potable water to transport wastewater from our homes and businesses to a reclamation facility, like the Inland Empire Utilities Agency (IEUA). This wastewater is then put through a tertiary treatment process that mimics nature's cleansing process. Solids are screened out of the wastewater in the primary phase of the treatment; then, in the secondary phase, the wastewater is subjected to an aeration process, where microbes and other bacteria are allowed to consume and dissolve the remaining organic material. Finally, in the third phase of the tertiary process, the water is filtered again and disinfected. The result is a highly purified type of water called recycled (or reclaimed) water.

To learn more about recycled water and purple pipes, visit http://www.ieua.org/. If possible, schedule a field trip to the Inland Empire Utilities Agency to learn more about the water treatment process. While you're here, you can check out the Chino Creek Wetlands and Education Park (www.ieua.org/educations/park.html ).

Here is a link for young students to learn more about the water cycle and the many uses of water: www.ieua.org/educations/education.html .

Wonderful Worms

Photo of earthworm, courtesty of "Dodo-Bird"
 There are over 3000 species of worms on the planet. The most common worm that we are familiar with is the earthworm. In scientific terms, earthworms are termed "megadriles" because of their large size. In fact, the earthworm is the largest member of its subclass Oligochaeta. However, earthworms are not the largest worms on earth; some worms can grow to be 22 feet long! These gigantic worms can be found in Australia or South America.

Worms are invertebrates, meaning they do not have a spine. They do however, have a digestive tract, reproductive organs, and multiple hearts. They have an interesting property of regeneration, meaning they can regrow parts of their body should a piece get cut off. A popular belief is that worms will regenerate into two distinct worms if they are cut in half; this is not usually the case. Worms tend to regrow only smaller parts of their anatomy.

Worms benefit humans in many ways; they serve a vital role as oxygen providers, decomposers, and nitrogen builders. Their presence in soil is considered a sign of soil health and vitality. Worms have pliable, moist bodies, which allow them to move through the soil easily. As they move through the soil they eat organic matter, small insects, and bacteria. The tunnels that worms leave in their wake actually aerate the soil, meaning it provides a space for oxygen to access the soil. Finally, the excrement of worms is called a "casting". Castings are nitrogen rich deposits that enrich the soil and help plants grow.

To learn more about worms, check out the following website: http://www.enchantedlearning.com/subjects/invertebrates/earthworm/Earthwormcoloring.shtml.

It provides a Read and Answer Quiz about earthworms.


Information for this post was found on http://en.wikipedia.org/wiki/Earthworm and the site listed above.

Thursday, October 27, 2011

Free workshop on vermicomposting (worm composting) at the Lyle Center in Pomona!


Photo of worm composting bin, courtesy of Josepah Bartmann
 To all the teachers and parents out there, if you'd like to learn how to get going on vermicomposting (worm composting). There will be a free workshop on November 5th at the Lyle Center for Regenerative Studies. You can use this wealth of information to teach students about worms, compost, decomposition, and all kinds of fun science activities. So if you'd like to teach your kids about worm composting and have never vermicomposted before, you can learn how to get started! You'll even have a chance to make your own worm composting bin! (There is a material fee for that part if you want to take it home though.)


Here are the details and how to RSVP from Anne Pandey at the Lyle Center:

On Saturday, November 5th  from 10:00 a.m. - Noon, the Lyle Center for Regenerative Studies will be offering a worm composting workshop where you can learn to reduce your waste stream and turn kitchen scraps into nutrient rich fertilizer. The two hour session will provide a wealth of information on how to start and maintain a worm bin and the benefits and uses of compost.  
Participants will also have the opportunity to build their own bins and receive worms, leaving will a fully functional worm composting unit. The workshop includes material fees of approximately $25, payable at the time of the workshop (the workshop itself is free so if you don’t want to take home your own worm bin at the end, you don’t have to pay the material fee).
If you wish to attend, please email crs@csupomona.edu.  Let us know whether or not you would like to purchase the materials to build your own bin.
Anne Pandey
Outreach Associate
John T. Lyle Center of Regenerative Studies

Tuesday, October 25, 2011

Pumpkin Patches


Photo of pumpkins, courtesy of Jeremy Seitz

Fall is the time of year when pumpkins are plentiful! It is estimated that the United States produces 1.5 billion pounds of pumpkins every year!


Pumpkins are from the genus Cucurbita , which is part of the gourd family. Cucurbitas are native to North America; the first known evidence of pumpkins dates between 7000-5500 BC in the area today known as Mexico.


Pumpkins are a winter squash, which means they have a thick outer shell to help them last throughout the winter. This self-preserving quality has made the pumpkin a staple of the human diet. In addition, there are certain types of pumpkins that have naturally high sugar content. Commonly called "baking" or "sugar" pumpkins, these pumpkins are used to make pumpkin pie and other desserts.


Pumpkins come in all shapes, sizes, and colors. At maturity, there are some ornamental pumpkins that are small enough to fit in the palm of your hand, while there are other pumpkins that can weigh over 1,000 pounds! However, the most common pumpkin that most Americans recognize is a medium-sized, orange pumpkin that we carve around Halloween. This variety is called the Connecticut Field pumpkin.


As with most fruits, the pumpkin is not only valued for its flesh, but for its seeds. This year when you carve your pumpkin, try to save as many seeds as you can. You can use some for planting next year, or if you want to make a treat out of them, you can soak them in salt water and roast them in the oven.


Monday, October 24, 2011

Monte Vista Elementary School Garden Under Way!

Check-in!
This past Wednesday and the Wednesday before, we have been working hard at Monte Vista Elementary School's garden.
Pick Axes!

We have almost completed the irrigation and we have completed making 6 of 10 vegetable beds.

Star Trencher of the day!
Parent volunteers, teachers, and students all came out and worked very hard to get everything done on task and on time!
Parents, Teachers, Staff and Students all working hard.

Even Principal Dixon was out there early shoveling away.
Principal Dixon digging trenches!
A great turnout of volunteers!

Wednesday, October 19, 2011

The Seasonal Sun


Photo of sun, courtesy of Martin LaBar


The sun is the star at the center of our solar system. Its mass is so large that its gravitational effect holds several planets in orbit around it. Our sun is only a medium-sized star classified as a yellow dwarf, but its diameter is still over 100 times that of Earth's diameter.


In our solar system, Earth is the third planet from the sun. In addition to a plentiful supply of oxygen and water, Earth's position has enabled life to evolve on our planet. Some of our most basic organisms, like plants, algae, and many bacteria, create food for themselves by drawing energy from the sun through a process called photosynthesis.


Earth is not exactly spherical; in fact, it bulges in the center around the equator. Earth's axis is also slightly tilted; the angled axis is what causes the seasons to change as earth makes its annual trip around the sun. The longest day of the year in the northern hemisphere is on June 21st and is referred to as the summer solstice. The shortest day occurs six months later on December 21st and is referred to as the winter solstice. Check out the picture below to see how the Earth is tilted and how that might affect the amount of sunlight/solar radiation the Earth receives at different times throughout the year.


Image of seasons, courtesy of Wally Glutton.


The tilt of the Earth creates another interesting phenomenon: a seasonal change in the height of the sun relative to the horizon. In scientific terms, the height of the sun relative to the horizon is called altitude. The sun's position, as it travels from East to West throughout the day, is called azimuth. Azimuth is simply an angled measurement of the sun's position relative to true north. During the winter in the northern hemisphere, the sun sits very low above the horizon even during the middle of the day; however, in the summer it has the potential to reach 90 degrees from the horizon, hence the term "high noon".


An understanding of the sun and seasons is extremely important to humans. Besides being the source of life, our system of food production is dependent on this knowledge. It makes sense that at the time of the year where the northern hemisphere receives the most solar radiation (summer), we are able to produce a lot of food.


As a fun experiment, pick a time and a day that you will be in class every month (for example, the 2nd Wednesday of every month at 11:00 am). Use a protractor to measure the height (in degrees) of the sun. Use the horizon as the base (0 degrees) and the sun as your target. Chart your monthly altitude measurement and at the end of the school year, you should see that the sun has followed the pattern described above.


For a more in depth experiment, visit the University of Oregon's Solar Radiation Monitoring Laboratory (http://solardat.uoregon.edu/SunChartProgram.html) and create a detailed graph of your observations.
Terms to look up: Solar System, Photosynthesis, Seasons, Altitude, Azimuth

Monday, October 17, 2011

Fall Fruiting Trees


Photo of Pomegranate, courtesy of Kristen Taylor
 Fall is an interesting time of year. When many of our summer plants are beginning to wither and our stone fruit trees have dropped their last fruit, something quite unusual happens. Two trees, pomegranates and persimmons, become full of bright, colorful fruit.

Pomegranates and persimmons bear fruit in the northern hemisphere between September and January. These trees do best in Mediterranean climates(such as ours in the Inland Empire), which consist of short, mild winters and long, hot to mild summers, and so are quite important to urban homesteaders in the area. Pomegranate trees bear medium-sized fruits with a dense outer shell that protect small berry-like seeds encased in spongy pulp. Cutting into a pomegranate is a notoriously messy process, because the seeds pop and squirt red liquid in every direction. A good tip is to fill a small bowl with water and submerge the pomegranate; then you can make your attempt to crack into its hard exterior. Your water will turn pink, but at least your shirt will stay clean.

Photo of Persimmon, courtesy of Frank Chan.


Persimmons are also a medium size fruit with a hard exterior. They begin as small green/yellow berries that ripen to a deep orange color. As the fruit ripens and softens the exterior becomes edible. Make sure you eat a persimmon only when it has fully ripened; if you try to eat one too early it will make your mouth pucker. Prior to ripening, the persimmon shell is full of tannic acid, which makes it bitter tasting. There are some varieties that are non astringent such as the Fuyu and those can be eaten before they are fully ripened. In fact it is very common for Fuyu Persimmons to be eaten while still crunchy. Persimmons are often used to make cookies and jams. They are pervasive within East Asian culinary cultures and they were extremely important to early Native Americans.

Interestingly, many persimmons in the US, including Asian varieties are grafted onto a North American rootstock. We had a Fuyu persimmon in our demonstration garden which, due to high winds, broke at the graft. Now the rootstock has created new growth, so we'll be getting a North American variety instead of an Asian variety. I'm looking forward to seeing how those fruits turn out.

The IEUA Garden in Every School program uses both of these fruit trees in many of our school gardens. Take a look in your garden to see if you have any pomegranates or persimmons. If you're feeling brave, grab a few pomegranates and come up with your own way to harvest its seeds. Or, for a more educational venture, look up the different uses for persimmons in Asian cuisine. You will probably find several varieties that you have never seen before.

Wednesday, October 12, 2011

The Wonder of Cover Crops


Photo of buckwheat cover crop,
courtesy of Al Pasternak


Cover crops are generally used in winter, or less optimal growing seasons (early to late fall). Planting a cover crop is a good choice if you find that you are too busy to garden over the fall/winter months or if you want to prepare your garden for production in the spring by providing it with nutrients.


Cover crops have many benefits; they include: increased soil fertility, increased nutrient levels (particularly nitrogen), suppressed weeds, pest and disease control, and best of all, reduced water use. They are typically fast growing crops of legumes, grasses or grains. Additionally, they provide a stable root system which reduces soil erosion from winter rains.


Planting a cover crop is easy. Simply pull all of the existing plants and weeds in your plot (Tip: make sure you pull weeds gently or you will shake seeds loose). Once your plot is clear, you can sprinkle several of your cover crop seeds over the planting area. At this point, you can add a thin layer of compost or potting soil. The planting density can be as thin or thick as you would like; cover crops will thrive under most density conditions (see the picture of buckwheat above for an example of density). Water your plot thoroughly and let it rest. Cover crops will require water early on in their growing cycle to establish their root systems.

Some common cover crops are buckwheat (pictured above), clover, sorghum, barley and winter wheat. Check out your local landscape center or nursery to see which varieties are available. A note of caution, some cover crops are perennials which means that they will need to be pulled at the end of the season. So make sure you purchase an annual plant type, which will die back at the end of the season.

For further reading see: http://en.wikipedia.org/wiki/Cover_crop and http://www.omafra.gov.on.ca/english/crops/facts/cover_crops01/cover_types.htm


Monday, October 10, 2011

The Onion Family


Photo of Leeks, courtesy of Karen and Brad Emerson

Onions and other aromatic plants belong to the genus Allium in the lily family. In fact, they are commonly referred to as "the stinking lilies" for their distinctive aromatic properties. There is a wide range of species within the genus Allium. They include: onions, leeks, garlic, chives, and shallots.


The Alliums grow best when planted in the fall as they prefer a cooler growing season. The average allium takes about 180 days to grow completely, from the time the bulb is planted to the time the plant is harvested. Growing onions from seed may take even longer. Planting bulbs can be purchased at your local hardware store, or you can order them from specialty seed stores if you want to try more exotic varieties like Russian Red, Ajo Rojo, or elephant garlic.

Photo of Mirepoix, courtesy of Island Vittles

The Allium family has been prized throughout history for its culinary properties. There are several regions in Europe that have incorporated alliums into the base flavor of their foods. As European explorers and settlers moved west, these regional flavor bases spread throughout North and South America. Today we may use these combinations and not be aware of their origins.

For example, the French use a flavor base of onions, carrots, and celery. This special combination is called mirepoix (pronounced: meer-pwah) and it is used in countless soups, sauces, and other flavorful recipes.


Have your students look up other regional flavor bases to see how they vary from location to location.

A good starting place is to investigate sofrito (Spain), sofritto (Italy), refogado (Portugal) and Suppengrun (Germany).

Also, check out locations in North and South America to see how European culinary influences exist today. Creole and Cuban cuisine will both be very promising.

Wednesday, October 5, 2011

The Potato Experiment: Examining How Your Food Grows


Photo Courtesy of "Seven Morris"

There are several experiments that can be done in the classroom to demonstrate differences in food production. One that works particularly well and can be done within a manageable time frame is the Potato Experiment. The goal of the potato experiment is to see how quickly potatoes from various production methods will sprout.

To do the experiment you will need three types of potatoes: a potato that was grown in your school garden, an organic potato from the store and a regular potato(non-organic) from the store. You will also need three large glasses; preferably tall, see through glasses so it's possible to track the root development of the potatoes. Finally, you will need some toothpicks to help hold the potato half-submerged in the glass. Use the picture to the left for assistance.


Have your class document the growth of the potatoes. Which one sprouts roots faster? Which one grows leaves sooner? Which one grows the most overall?


Have your class look into why there might be a difference or why there might not be a difference. If you're doing the experiment with a high school class, you can have them examine the use of chlorprophan as a bud suppressant and how it works.

Monday, October 3, 2011

It's that time of year again! Get started on a winter garden.


Photo courtesy of Alyss "AlyssssylA" Some leaf lettuce
in a square foot gardeing scheme.

Southern California's mediterranean climate enables year-round gardening. Late summer is typically the best time to start planting vegetables and herbs that grow well in cooler weather. There are several fall/winter vegetables that will thrive in the garden from October to late April/early May. Consider planting the following:


Brassica family: broccoli, cauliflower, cabbage, kohlrabi and brussel sprouts

Amaranth family: Swiss chard, spinach, and beets

Various root vegetables: potatoes, turnips, carrots, and radishes

Other lettuces and leafy greens: Mesclun, butter lettuce, and Red leaf lettuce.


Also, if you're starting a new garden with store bought potting soil, or if you've recently refertilized, remember that your soil will contain a high amount of nitrogen. Nitrogen is the element most needed to grow large root structures and the "green" parts of the plant, as opposed to the "fruit" part of the plant. To take advantage of the high nitrogen content in new soils, consider planting big leafy greens and lettuces.

Wednesday, September 21, 2011

Stork Elementary: School from the 09-10 program still going strong.

On Monday I paid a visit to Stork Elementary in Rancho Cucamonga. They received a garden grant back in the 2009-2010 school year. Marina Smith is the teacher that is in charge of the program and she speaks very highly of Brandi LaPorte who is a parent volunteer that takes kids out to the garden to teach them about science and she also does a lot of fundraising to keep the garden in active. The garden has three parts, the Climate appropriate garden with a dry riverbed pictured below 
Dry Riverbed and climate appropriate plants.
There is also a planter wall that includes many edibles such as squash and artichoke as well as some climate appropriate plants and some dwarf citrus trees which are climate appropriate AND edbile.
Lots of edibles and drought tolerants growing in planters.
At the end of the planters there is a slope with six terraced vegetable boxes. There are many plants including eggplants, peppers and squash.
Peppers, Eggplants and the wonderful Marigold companion to keep bugs away.

Most of the vegies and fruits are ready to be harvested and winter crops are going to be planted soon.
A cantaloupe loving the garden.

 Here is some okra which Mrs. Smith gave me some to take home.
I bet you've never seen okra still on the plant.
As you can see they've been quite succesfull all the summer squash are ready to be harvested and summer squash are ready to be planted.

This Banana squash is MASSIVE, one of those leafs is the size of my head.
 Mrs. Smith's class planted a small pumpkin patch and it has been quite succesful.
Pumpkin Patch!
Mrs. Smith gave me some okra and eggplant to take home. I shared some of them with some of my coworkers back at the office.
Okra and eggplants!
Mrs. Smith told me about some of Brandi LaPorte's fundraising for the garden. She does what she calls "Bread for the Garden" and sells fresh baked organic bread with some of the proceeds going back to the garden. She also will raffle off baskets of fresh produce that is produced from the garden. For all you gardeners, I'm sure you know how it is when too many things produce all at the same time.

Over the summer, Mrs. Smith would send e-mails and updates about the goings on of the garden since everyone was out of school. She was able to get a garden committee together and volunteers would come once ever monday to help weed, plant, and just in general keep the garden together and moving strong.

If you have a garden at your school, maybe you can take some of these ideas and alter them to fit your school garden. If you received a grant from us, you can always e-mail or call for some advice and we'd be happy to help point you in the right direction.

Congrats Stork for keeping such a wonderful school garden!

Tuesday, September 13, 2011

Preliminary Design for Los Osos High School's Garden

Here is a preliminary design for Los Osos High's garden. I'm waiting to hear back on any changes and once I receive those, I'll post some more detailed images of the design.

Friday, September 9, 2011

Upland High: Making Vegetable Boxes.

 Today Upland High had a minimum day, so we had just enough time to make six vegetable boxes. Here are some photos of kids making boxes.We are careful not to show any kids' faces.


Putting the boxes together

Putting chicken wire on the bottom of the boxes to keep critters out.